With its robust construction and ingenious design, the COMBAR Pro stands as a testament to uncompromising quality, crafted from materials that have been expertly chosen to meet the demands of the wild. In this blog, we'll delve into six essential ways hunters utilize the COMBAR Pro, from honing their skills during practice to the intricate work of game processing. Get ready to discover how this exceptional tool can enhance your hunting experience and become an indispensable companion on your journeys into nature's realm.
__________
PREPARATION
#1 Practice and Training
Before your hunting adventure begins, honing your skills and staying prepared are essential aspects of the hunting journey. The COMBAR Pro is great to bring along for practicing and training sessions in the great outdoors. Its folding hatchet blade provides a versatile tool for setting up camp or constructing blinds, offering valuable insights into practical fieldwork. With its solid head and rigid shaft, the COMBAR Pro handles hammering tasks with ease, helping you perfect your aim and precision. Additionally, the survival serrated knife concealed within the shaft is invaluable for cutting through ropes and branches, allowing you to simulate real-life scenarios effectively. Whether you're setting up targets or honing your fire-building skills, this multitool's compact design ensures it's always within reach. With the COMBAR Pro by your side during practice and training, you'll be well-prepared to face the challenges of the hunt with confidence and competence.

#2 Clearing Shooting Lanes
The perfect shot often depends on an unobstructed line of sight. This is where the COMBAR Pro truly shines. When you're out in the wild, the terrain can be unforgiving, with branches and underbrush obscuring your view. The COMBAR PROs hatchet and saw come to the rescue, allowing you to swiftly clear shooting lanes with precision and efficiency. Its sharp hatchet blade can effortlessly remove branches and undergrowth that might otherwise compromise your shot, while the folding pruning saw tackles thicker obstacles with ease. With the COMBAR Pro in hand, you can ensure that your hunting vantage points are unobstructed, increasing your chances of a successful and ethical hunt. Whether you're perched in a tree stand or hidden in a ground blind, this multitool becomes an invaluable asset in your pursuit of the perfect shot.
CAMP
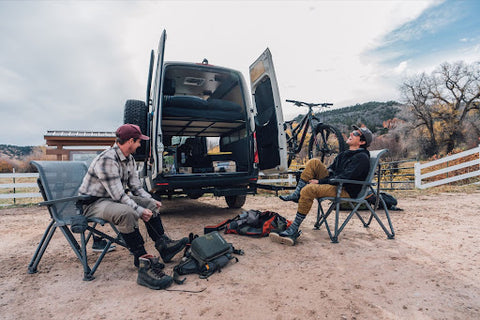
#3 Setting Up Camp
One of the most important parts of any camping trip is ensuring that you have the best camp set up to return to when you’re done for the day. Efficiency and practicality are paramount when setting up camp in the wilderness, and the COMBAR PRO excels in being the ultimate companion when setting up camp. Whether you're embarking on a multi-day hunting expedition or a weekend getaway, this versatile tool is your trusty companion. Its folding hatchet blade, solid head, and titanium spade provide a trifecta of capabilities for camp setup. With the hatchet, you can quickly clear the area and shape logs for seating or crafting makeshift tables. The titanium spade, with its 180º deployment, effortlessly digs holes for tent stakes or latrine purposes. The COMBAR Pro's ergonomic design and easy handling ensure that camp setup becomes a breeze, allowing you to focus on the camaraderie of the outdoors and the anticipation of the hunt. Whether it's constructing a comfortable base or organizing your gear, this multitool is your go-to resource for creating a practical and comfortable campsite.

#4 Processing Firewood
Processing firewood for camp is an art, a time-honored tradition that connects us with the primal elements of nature. It's in these moments, surrounded by the wilderness, that the COMBAR Pro truly shines. With its foldable hatchet blade and robust design, this elite tool effortlessly transforms the laborious task of gathering and preparing firewood into a gratifying experience. Just like the seasoned outdoorsman, we understand the importance of a well-prepared campfire. The COMBAR Pro's hatchet blade allows you to efficiently chop branches and logs into manageable pieces, ensuring a steady supply of fuel to keep your campfire burning bright throughout the night. To make kindle for camp, check out our blog all about how to make perfect campfire kindling. As we delve into the details of its exceptional design and capabilities, you'll discover how this multitool elevates the campfire experience, adding warmth and comfort to your self-reliant outdoor adventures.
#5 Emergency Situations
In the unpredictable world of hunting, nature can present us with unexpected challenges. That's where the COMBAR Pro truly becomes a lifesaver—quite literally. While our focus is always on the exhilaration of the hunt and the freedom of exploration, we're also keenly aware of the importance of preparedness. The COMBAR Pro, with its ingenious design and elite standards, stands ready to assist in unforeseen emergency situations during your hunting trips. Imagine finding yourself in a remote area, far from civilization, and facing a dire situation. It's moments like these when the COMBAR Pro's versatile capabilities come to the forefront. The survival serrated knife hidden within its shaft can prove invaluable for cutting ropes, fabricating shelter, or even providing food in a pinch. With its solid construction, this tool can handle critical tasks with ease, from building emergency shelters to fashioning tools for survival.
But let's not forget the practicality of the hatchet blade and titanium spade. In an emergency, they can be deployed to construct a signal fire or clear a path to safety. The COMBAR Pro's robust design ensures it's up to the task, even in the most challenging situations.
While our passion lies in the pursuit of adventure and the thrill of the hunt, we also understand the need for self-reliance and adaptability in the face of adversity. The COMBAR Pro embodies these values, serving as a trusty companion that can make a crucial difference when it matters most, allowing you to confidently navigate the unexpected while you chase your hunting dreams.

AFTER
#6 Processing Game
The culmination of a successful expedition is often marked by the moment of processing game. It's a time-honored practice where skill and precision are paramount, and this is another area of the trip in which the COMBAR can come into play.
-
Deer Hunting: When it comes to processing game like deer, the COMBAR Pro showcases its prowess. The robust folding hatchet blade provides the ideal tool for splitting rib cages and separating joints, ensuring efficient and clean butchering. Its rigid shaft and solid head offer the control and strength required for precise cuts, whether you're field dressing or preparing the animal for transport. The COMBAR Pro's versatility extends to the delicate work of skinning, thanks to its survival serrated knife, allowing you to complete the process with finesse.
-
Bird Hunting: For avid bird hunters, the COMBAR Pro's capabilities remain unmatched. After a successful waterfowl hunt, its knife becomes indispensable for plucking feathers and processing game with precision. The lightweight and compact design ensure it's easy to carry, making it the ideal companion for your waterfowl expeditions.
-
Big Game Hunting: Venturing into the wild for larger game, such as elk or bear, demands a tool that can handle the rigors of the task. The COMBAR Pro's hard-anodized aluminum and 420J2 stainless steel construction are up to the challenge. Its hatchet blade can tackle the toughest cuts, while the knife allows for detailed work. With this multitool by your side, processing big game becomes a manageable and efficient endeavor.
Conclusion:
We've explored the versatility of the COMBAR Pro across various facets of your hunting journey, from honing your skills during practice and training to ensuring you're ready for the unexpected in emergency situations.
Whether you're clearing shooting lanes, setting up camp, processing firewood, or handling the delicate task of processing game, the COMBAR Pro stands as your trusted companion, designed to elite standards. Its robust construction, multifunctional capabilities, and ergonomic design make it an invaluable addition to your hunting gear arsenal.
As you embark on your next hunting expedition, remember the versatility of the COMBAR Pro and how it can enhance your experience in the wild. Share these tips with your fellow hunters and enthusiasts, and let's empower the hunting community together. Whether you're a seasoned pro or just starting your journey, the COMBAR Pro ensures that you're well-prepared, self-reliant, and ready to embrace the exhilaration of the hunt.
__________
How do you use your COMBAR? Let us know on social media: @aclim8gear. And make sure to sign up for our email newsletter (sign up below) so you never miss a pro tip or trip report.
Looking for more information about using the COMBAR while hunting? Check out Diary of a Hunting Photographer: Ibex in Spain, Mule Deer in Mexico, and Mountain Lions in Idaho.
Ready to plan your next adventure? Here are the essential Rules of Thumb for Car Camping on U.S Public Lands.
__________
Shop the gear from this article: